What the heck have I been doing with myself?
Honestly? I've been incredibly busy, just not with making as much stuff as I would like.
I have however been growing stuff (which I will share some images of).
Just recently I have gotten a fire in my belly again for the making, and thus I am back with posting to the blog. My latest project is a pair of 18th century stays using the JP Ryan strapless stays pattern.
I decided that it was time to have something to wear in my historical reenactment events that was a bit nicer than my leather jumps, and so wanted a pair of custom made stays, (corset) but was unwilling to pay the $300 and up to have them done. So as a challenge, I am making them myself.
I started on Saturday, October 11, and here is what I got done:
1. -Cut, sewed and fit the fitting muslin (out of muslin of course) which will then be used as the lining
2. -Cut the face and interfacing of the stays out of cotton drill which is a very heavy bodied fabric. (These are meant to be functional, not fancy)
3. -Sewed the face and interfacings together with a contrasting thread (machine stitched) so I could see the work
4. -Sewed up the body of the piece from the sandwiched face/interfacing pieces, once again in contrasting thread, and pressed open

5. -Sewed in the channels for the boning (yeah, machine stitched again, don't kill me, I only have a week to get this done) in a pale gold thread so it will be ever so slightly noticeable.
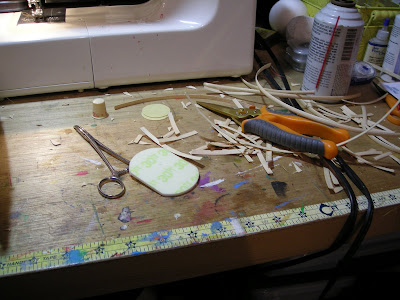
6. -Then I individual fit the bones into the channels. The channels were sewn to be 1/4 inch plus 1/16 ease to fit a 1/4 inch bone. I sewed all the channels freehand without marks, using only the presser foot as a guide, so it was a gamble if the bones would fit. I wanted to use half round basket reeding as my boning material, as this is fairly period correct. I cut each piece, shaped and sanded the ends, and in some cases, shaped the sides to fit the slightly more narrow edge channels. I ended up fitting in 88 bones to make a fully boned corset. I still have two bones to fit on the very ends outside the lacing eyelets....

The detritus of boning....

7. -I used a hammer and round punch to cut in the eyelets on one side (however after testing by sewing the eyelet, it may be too small and I may have to re-cut with a larger punch). I also turned the back edges over and hand basted the edge prior to punching the eyelets.

Wish me luck!


4 comments:
What an incredible work! It looks fantastic so far. I can't wait to see the finished piece. Well done!
This is amazing!
Amazing work, I'd love to make one too! Is the pattern freely available? Never looked for one :-)
I used a JP Ryan pattern for strapless stays. You can find it for order at many different websites...it worked up fairly simply and runs about $15.
Post a Comment